French toast hearts

French toast hearts

French toast hearts

The perfect valentine’s breakfast!

And generally perfect breakfast anytime to be honest.

Serve with your choice of toppings, I went with Greek yogurt and fresh raspberries which was delicious, but I reckon strawberries and cream would work pretty well too. Or banana and ice-cream… going to have to make them again now just to try the different variations!

This recipe serves 2, as befits a valentine recipe.

Ingredients:

  • 4 slices from a small sliced brioche loaf
  • 3 tbsp Nutella
  • 1 medium free range egg
  • 75ml milk
  • 1 tsp vanilla extract
  • 1 tbsp caster sugar
  • 2 tbsp hazelnuts
  • 1 tbsp butter/splash of oil
  • icing sugar, for dusting

Method:

  1. Thickly spread 2 of the brioche slices with the Nutella, then top with the remaining slices to make 2 sandwiches. Use a sharp knife or a heart shaped cutter to cut the sandwiches into hearts (save the offcuts to nibble on as chef’s perk, they are delicious just as they are).
  2. Finely chop the hazelnuts and toss in a hot frying pan til lightly toasted, then tip onto a plate.
  3. Whisk the egg, milk, vanilla and caster sugar in a wide, shallow bowl. Dip the sandwiches into the egg mixture, leave for 1-2 mins each side to allow the brioche to soak up the liquid, then dip one side of each sandwich into the nuts. (Don’t leave them too long as they will lost structural integrity and can be hard to pick up!)

    hearts soaked in love… no, wait thats vanilla egg goodness, but very similar!

    hearts soaked in love… no, wait thats vanilla egg goodness, but very similar!

  4. Heat the butter (or oil) in a wide frying pan until melted and foaming. Add the sandwiches and cook for 1-2 mins each side until golden brown. Dust with a little icing sugar and serve with something creamy and something fruity! Greek yogurt and raspberries went perfectly.

    hazlenut hearts

    hazlenut hearts

(all photo credits miss suzylee)

Christmas wreath

finished wreath

finished wreath

I’ve always wanted to have a nice wreath to hang on my door at Christmas, but so often they are either incredibly expensive (one day I will save up for the peacock feather one from Liberty) or look a bit naff… so when my friend gave me a wreath hoop I was very excited to make my own.

It was a lot of fun to make, whilst listening to Christmas music naturally, and really got me into the festive spirit!

You can make it anyway you want, but this is how I did mine.

Used:

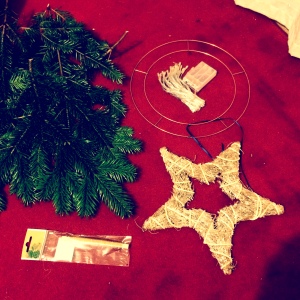
  • wreath hoop
  • florist wire
  • tree off cuts (ask a friend or neighbour if you don’t have a live Christmas tree)
  • battery powered fairy lights
  • star
  • ribbon
  • wire cutters

    components

    components

Method:

  1. Take the off cuts and cut them into pieces that are small enough to lay across the hoop without going too far over – unless you want a much bigger, bushier look in which case feel free!

    attaching the foliage

    attaching the foliage

  2. Use the florists wire to wire the tree pieces to the hoop, and carry on around layering up as you go to hide any gaps.

    first step done

    first step done

  3. Wind the fairy lights round and round amongst the foliage, and wire the battery pack to the hoop at the back where it will be hidden.

    fairy lights

    fairy lights

  4. I had a twiggy star that I wanted to incorporate, but this is completely optional – I attached the star to the hoop with florists wire.
  5. Tie a length of ribbon (or twine, or whatever suits) to the wreath and use it to secure to the door (a hook on the inside of the door is useful, either a command hook or something more permanent so the ribbon can pass over the top of the door from the outside and attach on the inside).
  6. Ta-dah!

    welcoming festive door

    welcoming festive door

(all photo credits miss suzylee)

Best Christmas cake ever (probably)

Christmas cake

Christmas cake

A bold claim I realise, but definitely the best one I have made so far. Tasty, not so crumbly you can’t slice it but still plenty of fruit and very more-ish!

Just remember to make it at least a month before Christmas if not two in order to have time to ‘feed’ the cake and allow the marzipan to dry after applying it. Also remember you need to soak the dried fruit the night before you intend to bake this cake.

Ingredients

  • 9oz/250g sultanas
  • 4oz/100g currants
  • 14oz/400g raisins
  • 6oz/170g glacé cherries
  • 3oz/75g mixed peel
  • Zest of 1 lemon
  • Zest of 1 orange
  • Freshly squeezed juice of ½ lemon
  • 3floz/80ml sherry
  • 6oz/175g butter (room temperature)
  • 1oz/25g black treacle
  • 6oz/175g dark muscovado sugar
  • 3 medium free range eggs, beaten
  • 1oz/25g glycerine
  • 8oz/220g plain white flour
  • 1 tsp/4g mixed spice
  • ½ tsp/2g ground cinnamon
  • 1½oz/40g ground almonds

Method:

1. The day before, place the dried fruits in a large bowl with the lemon and orange zest. Pour the lemon juice and sherry over and stir the fruit well until thoroughly mixed and evenly coated in the juices. Cover with clingfilm and leave to stand overnight.

2. The next day, line the base of an 8in/20cm deep cake tin with a disc of baking parchment. Place a “collar” of baking parchment around the inside of the tin. Heat the oven to 140C/275F/gas mark 1.

3. Put the soft butter into a large bowl with the treacle and sugar and beat until the mixture is light and fluffy.

4. Take the beaten egg and beat it a bit at a time into the butter mixture.  If the mixture curdles add a tablespoon of the flour. Next stir in the glycerine and then sieve over the flour and spices. Finally, add the ground almonds and gently fold everything together.

5. Tip in the soaked fruit and again fold through the mixture until it is evenly blended. Place the mixture in the prepared baking tin and level off.

6. Bake for approximately 2 hours until the cake is golden brown in colour and baked through the middle. (You may need to cover the top of the cake three quarters of the way through baking to protect it from burning – use a folded piece of baking parchment or piece of card.)

7. When it is baked, remove the tin but leave the baking parchment sticking to the sides and base. Allow to cool.

8. When the cake is completely cold, prick the top, pour over a couple of tablespoons of sherry and allow it to soak through.

9. The cake should then be wrapped in a clean sheet of greaseproof paper, followed by foil, and placed in an airtight tin somewhere cool and dry. ‘Feed’ the cake with more sherry each week until approximately 2 weeks before you want to eat the cake.

A week after you stop feeding the cake, you can cover it in marzipan and then decorate it. To do this:

Ingredients:

  • pack of marzipan (or make your own if you feel very enthusiastic!)
  • 2 tbsp seedless apricot jam
  • icing sugar (to dust)
  • icing
  • decorations

Method:

1. Boil the jam and then let cool. Use a pastry brush to spread the boiled, cooled jam over the cake (it needs to be boiled to prevent mould forming). Remember to put the cake on a thick cake board or plate as it will be very heavy by the time you are done!

naked cake

naked cake

2. Sprinkle icing sugar on a clean work surface and roll out the marzipan to about 3-5 mm thickness, trying to keep it as round a shape as possible.

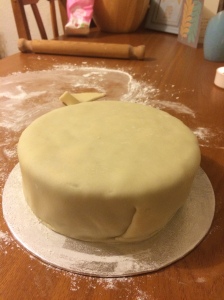
marzipan

marzipan

3. Use the rolling pin to help you lift the rolled out marzipan and drape this carefully over the jam covered cake. Using your hand gently smooth the marzipan over the cake, and trim the edges with a knife. The marzipan will be covered with icing, so if you need to patch any gaps don’t worry, it won’t show in the end.

finished marzipan

finished marzipan

4. Leave uncovered to dry for a few days.

5. Finally its time to ice the cake and decide how to decorate it!

For this cake I covered it in a pack of royal icing, but with a tea spoon of glycerine to stop it going too hard and brittle.

To make the trees:

  • fondant icing
  • green food colouring
  • scissors
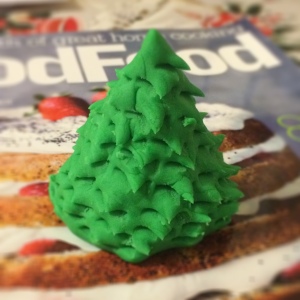
  1. Use green fondant icing, or use green food colouring to dye white icing. Form cone shapes by rolling in your hands.

    trees part 1

    trees part 1

  2. Leave to firm up a little (it will be quite soft from the heat of your hands), then use scissors to snip into the tree, starting at the top and working your way round to the bottom to form the tree detail.

    trees part 2

    trees part 2

  3. Leave to firm up again (for an hour or so) and then carefully place them on the cake.

    trees part 3

    trees part 3

  4. Dust with icing sugar for a snowy effect.

Have fun baking and decorating and generally getting into the festive spirit!

(all photo credits miss suzylee)

Chocolate and passionfruit cake

IMG_3298I was looking for inspiration for a birthday cake recently and came across this recipe for a Chocolate layer cake with passion fruit icing | BBC Good Food.

Mine turned out slightly differently (I only made two layers and I spread the buttercream out rather than piping it for a more ‘rustic’ feel as I ran out of time!) but it was absolutely delicious and I have received more requests for this recipe than anything else I’ve made so I strongly suggest trying it! It went very well with vanilla cupcakes and GF Bakewell Slice | miss suzylee.

IMG_3297

(all photo credits miss suzylee)

GF Bakewell Slice

birthday baking

birthday baking

I always like to have a gluten free option when I bake for parties so no-one has to feel like they are missing out – this time I decided to make a Bakewell slice traybake. It was a big winner and soon disappeared, not just being eaten by the GF guests!

Ingredients

Pastry base:

125g gluten free plain flour

1 tsp xanthan gum

30g icing sugar

50g butter

1 free range egg yolk

Filling:

120g butter

115g caster sugar

4 free range eggs, beaten

125g ground almonds

1/4 tsp almond extract

160g raspberry jam

Topping:

25g flaked almonds

75g sifted icing sugar

3 tbsp boiled water

Method

  1. Preheat the oven to 180/160 fan/gas mark 4. Line a 20x30cm shallow baking tin with baking parchment.
  2. Pastry base: sift the flour, xanthan gum and icing sugar into a large bowl, add the butter and rub in until the mixture resembles breadcrumbs. Add the egg yolk and 2 tbsp cold water and mix together with a knife until the mixture comes together in beads. Gather into a ball, wrap in cling film and leave in the fridge for 30 minutes.
  3. Once chilled, remove the pastry from the fridge and roll out between two sheets of baking parchment (the mixture will be very sticky and this stops it sticking to the side or the rolling pin). Place the rolled out pastry into the baking tin and press gently into the corners.
  4. Bake for 10 minutes then remove and leave to cool (leave the oven on).
  5. Filling:  Beat the butter and caster sugar until light and fluffy (about 3 minutes using an electric whisk on a high setting). Gradually beat in the eggs on a medium speed then fold in the ground almonds and almond extract until combined.
  6. Spread the jam over the pastry base, then spoon the filling over the jam and sprinkle with the flaked almonds.
  7. Bake for 30-35 minutes until golden brown and firm to the touch. Leave to cool in the tin, then carefully remove from the tin.
  8. Topping: Mix the icing sugar with the boiled water to make a runny paste, then drizzle over the Bakewell slice. Leave to set, the cut into squares and serve.

Double trouble

Double trouble

Double trouble

I haven’t been baking for a while as I moved house and the new kitchen… has potential. But a bit limiting at the moment! SO I have set up a baking station in one of the other rooms for now. And so I couldn’t resist making a couple of different cupcakes!

baking station

baking station

First up:

Ginger cupcakes

Ingredients

For cupcakes:

200g unsalted butter (room temperature) or sunflower spread if you want to make them a bit healthier which I did!

175g dark soft brown sugar (you can use any soft brown sugar if you don’t have the dark stuff in)

3 tablespoons black treacle

150ml milk (semi skimmed is fine)

4 chunks of stem ginger, chopped

2 free range eggs

300g self raising flour

1 tablespoon ground ginger

pinch of salt

For the frosting:

140g unsalted butter (room temperature)

2 teaspoons lemon juice

4 tablespoons ginger syrup (from the jar of stem ginger)

300g icing sugar

Method

1. Preheat the oven to 160 fan/gas mark 4 and line two muffin trays with cupcake cases (makes 18).

2. Melt the butter/sunflower spread, sugar and treacle in a saucepan over a low heat, then leave to cool before stirring in the milk.

ready to melt

ready to melt

3. Beat the eggs in a bowl and then add the chopped stem ginger – beat this into the melted butter mixture.

stirring

stirring

4. Add the flour, ground ginger and salt to the mixture and stir to combine thoroughly.5. Spoon into the cupcake cases and bake for 30 minutes – a skewer inserted should come out clean.

6. Leave to cool on a cooling tray whilst you make the frosting.

7. Beat the butter with an electric whisk until smooth, then add the rest of the ingredients and beat for about 5 minutes until smooth and creamy – you will see the colour change from yellow to almost white.

8. Add the frosting – I dolloped it on with a spoon and swirled it around, if you want to pipe the icing you may need to make a larger batch.

someone's watching...

someone’s watching…

Next up:

Banana and chocolate cupcakes

Ingredients

For the cupcakes:

125g unsalted butter (room temperature) or sunflower spread

250g caster sugar

2 free range eggs

1 teaspoon vanilla extract

250g plain flour

2 teaspoons baking powder

4 ripe bananas, mashed (based on ‘average’ banana size – I only used three as mine were huge, but then again I don’t think you can ever have too much banana in a cake

175g dark chocolate chopped or broken into pieces

For the frosting:

125g chocolate

50g butter (if you are using eating chocolate like Cadburys then you can cut out most of the butter or it will end up really greasy)

1 tablespoon golden syrup

1 teaspoon vanilla extract

chopped candied peel (optional)

Method:

1. Preheat the oven to 160 fan/gas mark 4 and line a muffin tray with cupcake cases (makes 12)

2. Cream the butter and sugar (electric mixer is easiest) for about 5 minutes until pale and smooth.

3. Add the beaten eggs and vanilla and beat again to combine.

4. Add the flour and baking powder and beat again until well combined.
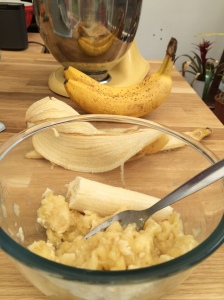
it was all yellow...

it was all yellow…

5. Stir in the mashed banana and chopped chocolate, then spoon into cupcake cases and bake for about 25 minutes – a skewer inserted should come out clean.
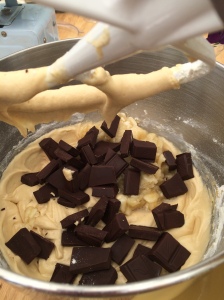
Chopped chocolate

Chopped chocolate

6. Leave to cool on a cooling tray whilst you make the frosting.

7. Melt the chocolate, butter and syrup in a bain marie (or in a bowl suspended over a pan of hot water), stir until smooth then add the vanilla and stir until smooth again. Stir in the candied peel if using. Dollop on the cupcakes!

I honestly can’t pick a favourite between these two!

(all photo credits misssuzylee)

u

Raspberry and amaretti cheesecake

awesome cheesecake

awesome cheesecake

This is awesome. I mean I love cheesecake and the oreo one I made was pretty good, but this one has now taken over as the best ever (at least until the next one – so fickle…)

Ingredients:

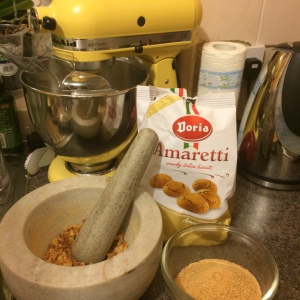
  • 200g amaretti biscuits (you could double this and the amount of butter if you wanted a thicker base)
  • 100g unsalted butter, melted
  • 3 sheets of leaf gelatine
  • 142ml carton single cream
  • 300g full-fat soft cheese (for cheesecake I always use Philadelphia but thats personal taste of course)
  • 100g golden caster sugar
  • finely grated zest of half a lemon
  • juice of one lemon
  • 300g raspberries
  • 142ml carton whipping or double cream
  • 1 medium free range egg white

    ingredients

    ingredients

Sauce ingredients:

  • cup full of raspberries
  • splash of water
  • teaspoon of cornflour

Method:

  1. Crush the biscuits with a pestle and mortar (a few at a time will let you get smaller crumbs) or seal the biscuits in a plastic bag and crush them to fine crumbs with a rolling pin. Tip into a bowl and stir in the melted butter, mixing thoroughly so that all the crumbs are soaked.

    buttery biscuit base...

    buttery biscuit base…

  2. Tip the mixture into a DEEP loose-bottomed 24cm round cake tin, at least 5cm deep, which has the base lined with baking parchment (if you don’t do this you will find it hard to get the biscuit base away from the tin base when you come to serve it) and press down with the back of a metal spoon to make an even layer over the bottom of the tin. Chill in the fridge while you make the filling.
  3. Submerge the gelatine leaves in a dish of cold water, and leave to soak and soften for 5 minutes. Pour the single cream into a pan and bring just to the boil, then take off the heat. Take the gelatine leaves out of the water, give them a squeeze to get rid of excess water, and stir one by one into the cream (they will dissolve instantly). Leave to cool for a few minutes.
  4. Beat the cheese in a bowl with the sugar, lemon zest and juice until smooth and creamy. Mix in the single cream and gelatine mixture and the raspberries.

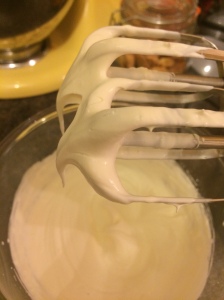
    soft peaks

    soft peaks

  5. In another bowl, lightly whip the whipping or double cream so it falls in soft peaks, then fold it into the strawberry mixture.

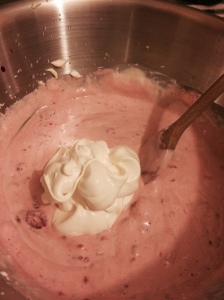
    cheescake mixture

    cheescake mixture

  6. Whisk the egg white in a clean bowl until it forms stiff peaks, then fold gently into the cheese mixture. Pour into the cake tin and smooth down lightly. Chill for at least 21⁄2 hours until set, overnight is great.

    egg whisk

    egg whisk

  7. Make the sauce by mixing all the ingredients together in a pan over a medium heat and bubble until reduced to a syrupy consistency. Pour through a sieve to remove the seeds (the mixture will take ages to go through but you will get more than you first think you will) and leave to cool, then put in a piping bag with the end snipped off and pipe dots of the sauce in a spiral pattern on the cheesecake from the centre out. Mine blobbed a bit in places, but don’t worry about it!
  8. Take a toothpick, think skewer or something similar and draw a line through each dot so they run together in something like a heart pattern. Ta-dah!

(all photo credits miss suzylee)

Pancakes, gluten free style (not that you’d know)

gluten free pancakes

gluten free pancakes

Pancake Day seems like the worst idea for eating gluten free, but these pancakes taste just like the ‘real’ thing and are dead easy! Note: these are traditional English pancakes e.g. like crepes, not the thick American style ones.

A bit belated because somehow I never seem to get myself together to make them actually on pancake day (or anywhere near it!) but pancakes are always good aren’t they! And a great idea for weekend brunch…

Ingredients:

  • 125g gluten-free plain flour
  • 1 free range egg
  • 250ml milk
  • oil (for frying)

Method:

  1. Whisk the ingredients together in a bowl to make a smooth batter.
  2. Heat a small amount of oil in a frying pan over a medium heat and allow to heat through properly.
  3. Pour or ladle just enough batter to cover the bottom of the pan, swirl around to cover it all.
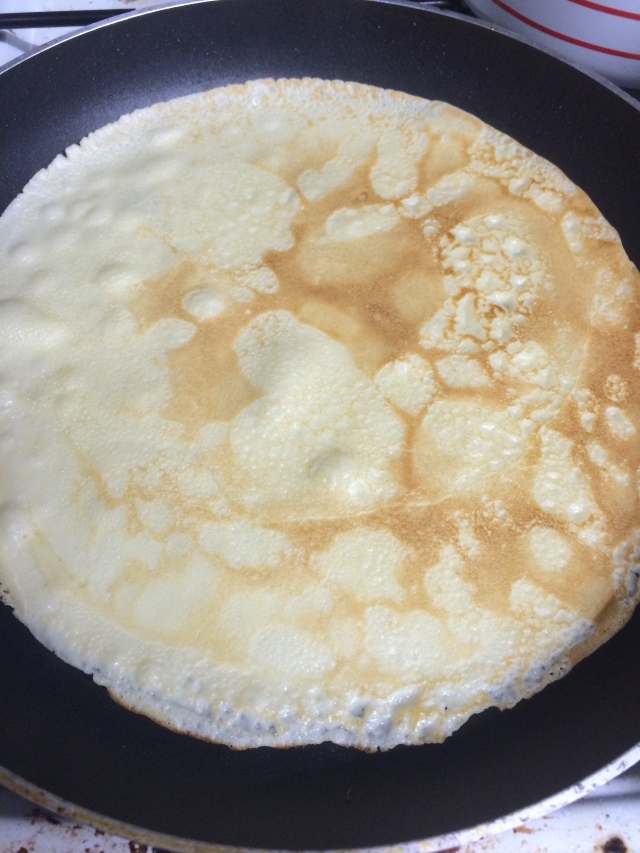
  4. Use an egg flip to lift the edges, and swoosh the pan around – the pancake shouldn’t stick but should move easily. Quite quickly (after about a minute) you should be able to flip it (use the egg flip if you struggle to toss it!) and then cook for another minute on the other side.
  5. Serve up, and repeat til the batter is gone.
  6. Serve with whatever you like! Lemon juice, orange juice, sugar, maple syrup, nutella…

(all photo credits miss suzylee)

Paper cuts – the good kind!

hedgehog

hedgehog – not bad for a beginner

I am a big fan of paper cut art, particularly the amazing Rob Ryan. After spending a lot of time staring at other people’s work I decided to give it a go, and found this great beginners kit from another artist, Paper Panda, which comes with absolutely everything you need to give it a go: Introduction to Papercutting DIY Pack – Includes Equipment OVER 18’s ONLY / Paper Panda.

squiggle

squiggle

So far I am only part way through the practice designs, but I can’t wait to give the proper ones a go! Who knows, maybe this time next year I will be cutting out my own designs – its certainly inspiring.

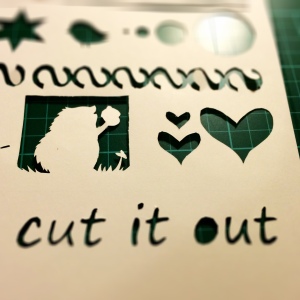
cut it out

cut it out

(all photo credits miss suzylee)

Easy no-bake Oreo cheesecakes

Oreos

Oreos

This recipe is perfect for when you need to rustle up a quick dessert, or if you aren’t very confident with baking cheesecake. I know from bitter experience that the base of a cheesecake is harder to make than it looks, and as soon as you slice into it the whole thing can fall apart! This recipe makes several smaller cheesecakes in individual pots so there is no need to worry about slicing. Also, unlike other ‘quick’ cheesecake recipes I have seen, this one really is – you can make it and pop it in the fridge just before you serve the main course and it will be ready to eat by the time you have finished. No need to chill overnight!

It would also be a great dessert for valentines day, especially if you can find a heart shaped pot like these to make it in: Stoneware Heart Ramekins – Le Creuset. It is so quick to make you can then relax and enjoy the evening!

Ingredients:

  • 150ml double cream
  • 150g Philadelphia cream cheese
  • good shake of icing sugar
  • pack of Oreo cookies

You will also need about 6 ramekins/teacups/small pots.

Method:

  1. First, you need to break up the Oreo cookies. I used a pestle and mortar, but you can bash them up inside their packet using a rolling pin or other heavy implement!

    pestle and mortar

    pestle and mortar

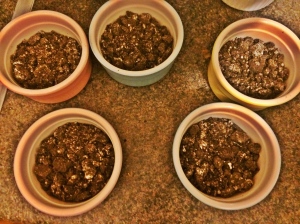
  2. Put a little of the ground cookies to one side (to sprinkle on top later) and divide the rest between the ramekins so that the base of each has a good covering. Push it down a bit to form a slightly firmer base (the cream of the cookies will help them stick together, so you don’t need to add butter as you often do when making a cheesecake base).

    cheesecake bases

    cheesecake bases

  3. Whip the double cream in a bowl until it forms soft peaks, then add the cream cheese and a good shake of icing sugar and beat it all together. Taste a bit and add a bit more icing sugar if you want it sweeter.
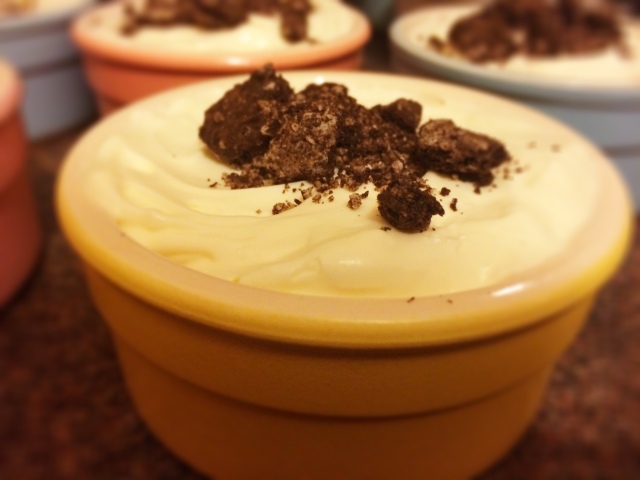
  4. Spoon the cream mixture over the cheesecake base (you can spread it out, leave it as a dollop or however you want to do it) then sprinkle the remaining ground cookies on the top.
  5. Pop in the fridge for as little or as long as you like – the longer you leave it, the firmer the cream topping will be but I found it perfectly fine after an hour.

    Oreo cheesecakes

    Oreo cheesecakes

(all photo credits miss suzylee)